How to Back Up and Unback Up Google Photos?

In the digital era, your smartphone is likely the most-used camera you own. Every photo you take is a memory, a document, or a work of art. But with thousands of images stored across your devices, one unexpected loss or glitch can wipe them out. That’s why backing up photos is essential—and Google Photos has long been one of the most reliable tools for that job.
However, while backing up your images to Google Photos is relatively easy, unbacking them or managing your stored files can be confusing. This article provides a complete guide on how to back up / unback up Google Photos, and how to find and delete backed-up images.
1. How to Back Up Google Photos?
Google Photos offers automatic backup features across Android, iOS, and the web. Here’s how to enable backups on various platforms:
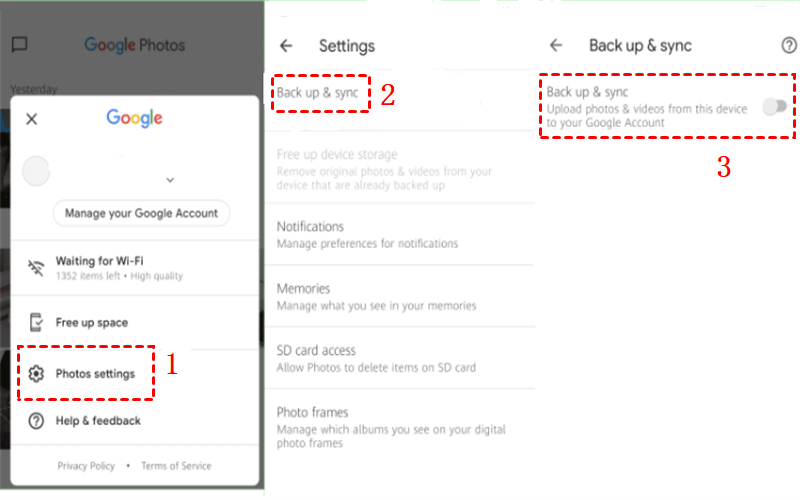
- On Mobiles:
Open Google Photos on your phone, tap your profile icon, go to Photos settings, turn on Back up & sync, select your account, and set your preferred upload and data usage options.
- On Desktop (via Backup and Sync or Drive for Desktop):
Download and install Google Drive for Desktop > Log in and go to Preferences> Under My Computer, select the folders you want to back up > Choose Upload photos and videos to Google Photos, then hit Save.
With automatic sync enabled, all selected folders and photos will be backed up to Google Photos, accessible across all your devices.
2. How to Find Backup Photos on Google?
Once backup is complete, your photos are stored in the cloud and accessible from any device with an internet connection.
- Using Web Browser:
Go to https://photos.google.com and log in with your Google account > All backed-up photos will be displayed in your Photos tab, organized by date.
- Using the Google Photos App:
Open the Google Photos app > You’ll see all backed-up photos under the Photos tab > Use the Search bar to find photos by people, places, or objects using Google’s smart AI tagging.
- Using Google Drive (if linked):
If you’ve linked Google Drive to Google Photos, you can: Open Google Drive > Choose Computers or Google Photos folder > Find your synced and uploaded images.
3. How to Unback Up Google Photos?
Sometimes you might want to stop certain folders from syncing or prevent Google Photos from automatically uploading images. Here’s how to unback up content:
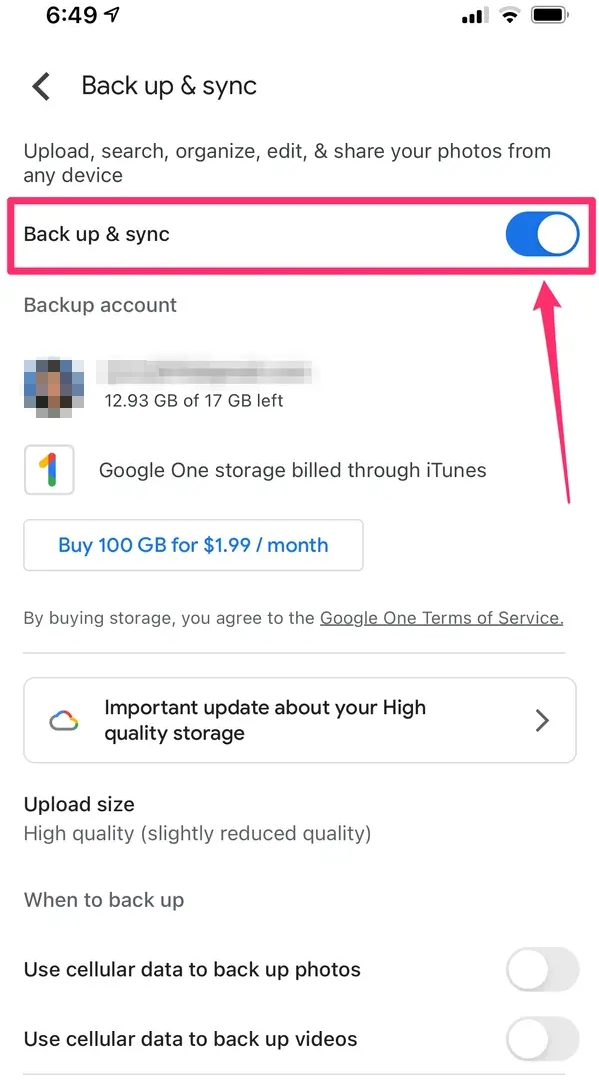
- Disable Backup on Mobile Devices:
Open the Google Photos app > Tap the profile icon > Photos settings > Toggle Back up & sync OFF.
This will stop the app from uploading new photos but won’t delete already backed-up photos from your Google account.
To stop syncing specific folders: Go to Photos settings > Back up > Back up device folders > Toggle off the folders you don’t want to sync (like Screenshots, WhatsApp Images, etc.).
- On Desktop:
Open Drive for Desktop preferences > Uncheck the folders you no longer want to sync to Google Photos, then click Save.
4. How to Delete Backed Up Photos on Google?
Deleting photos from your device doesn’t always remove them from the cloud. If you want to free up space or remove specific photos from your Google Photos account, follow these steps:
- Delete from Google Photos App:
Open the Google Photos app > Long-press on the image(s) you want to delete > Tap the trash bin icon > Confirm by selecting Move to Trash.
Note: The photo will be deleted from all synced devices and moved to Trash, where it will stay for 60 days before permanent deletion.
- Delete via Google Photos Web:
Navigate to photos.google.com, select the backed-up images you’d like to remove, and click the trash can icon in the top-right corner to delete them from your library.

To permanently remove them: Go to the Trash folder and select Empty Trash.
Warning: If your images are not backed up to another cloud or hard drive, this deletion is irreversible after 60 days.
5. Back Up/Download All Google Photo Using Imaget
If you want to download all your backed-up photos from Google Photos in high resolution or organize them offline, manual downloading is time-consuming and inefficient. That’s where Imaget comes in.
Imaget is a professional bulk image downloader tool designed to help users download high-resolution images from various platforms, including Google Photos, Instagram, Pinterest, and more. Whether you want to archive all your photo backups or transfer images to another service, Imaget makes the process seamless.
Key Features of Imaget:
- Bulk Download: Download thousands of photos with one click.
- Full HD Quality: Supports downloading up to original 1080p or higher resolution.
- Folder Management: Create photos albums and rename filenames to organize backed-up photos.
- Fast and Secure: Imaget ensures encrypted, reliable downloads with minimal data loss.
- Cross-Platform Support: Available on Windows and macOS.
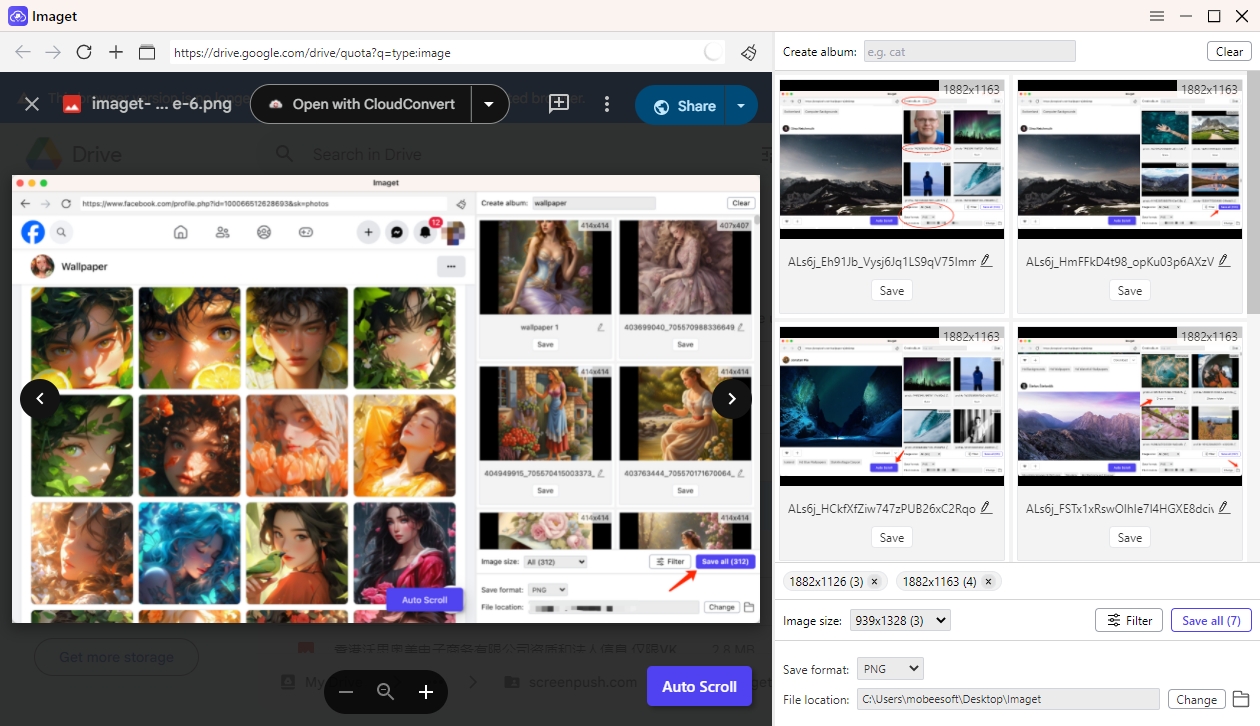
How to Use Imaget to Download Google Photos:
- Get the Imaget installer file for your OS from the official website, then set up the software.
- Log in to your Google account securely through the Imaget built-in browser, then open the Google Photos page and make Imaget extract photos from the page.
- Filter desired photos that you want to back up offline, then click Save all button and let Imaget download them in bulk.
5. Conclusion
Managing your Google Photos can be straightforward if you know the right steps—backing up ensures your memories are safe, while unbacking and deleting backed-up content can help you manage storage and privacy. However, downloading your photos in bulk, especially in full resolution, can be a real hassle using Google’s built-in tools.
Imaget solves this problem with its powerful and easy-to-use bulk image downloader. Whether you’re switching services, organizing your archives, or simply want local copies of all your photos, Imaget provides the most efficient solution available.
If you want complete control over your Google Photos library, Imaget is the best tool to ensure all your photos are safely downloaded, organized, and available whenever you need them.